Winterize your tiny house by prioritizing R-value upgrades (R-21+ walls, R-38–49 roof) and continuous air sealing with smart vapor retarders. Seal doors/windows, tape flanges, and verify with a blower-door/IR scan. Add skirting, protect plumbing with R-3+ sleeves and heat trace, and insulate/heat water tanks and hoses.
Tune heat loads, service appliances, manage propane, and set battery/PV cold limits. Schedule maintenance checks and stage an emergency kit with CO alarms and power backup—then apply pro tips step-by-step next.
Key Takeaways
-
Seal the envelope: weatherstrip doors/windows, tape air barriers, and add exterior insulation; target R-21+ walls, R-38–49 roof, R-30–38 floor.
-
Protect plumbing: insulate pipes (R-3+), heat-trace exposed runs, seal penetrations, and keep chases above 50°F; use heated potable hoses.
-
Optimize heating: service equipment, set efficient thermostats (66–68°F day, 60–62°F night), verify CO detectors, and size heat output to peak load.
-
Prepare power: clear and tilt solar, use MPPT with cold-Voc headroom, enable low-temp battery charge limits, and test generator cold starts.
-
Stock emergencies: CO alarm, extinguisher, antifreeze, heated hose repair kit, water reserves, backup power, and a 24–72 hour contact and action plan.
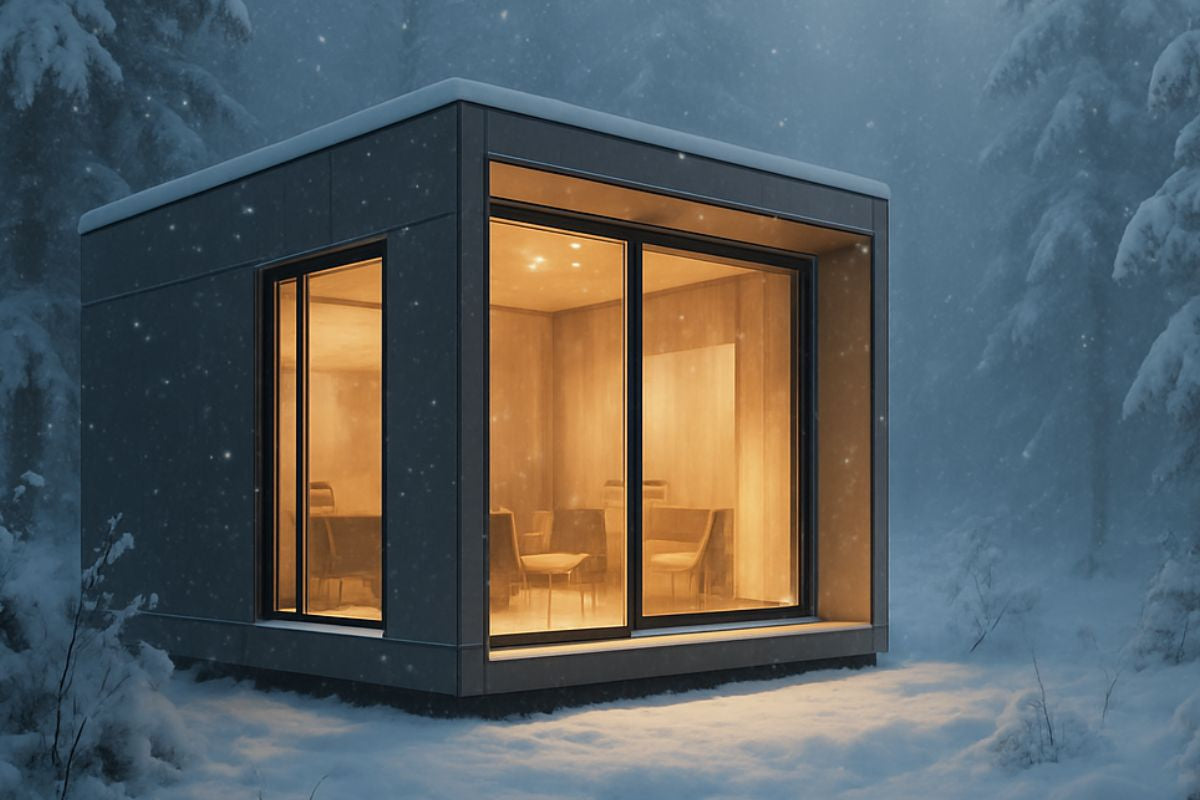
Insulation Upgrades and Thermal Bridging Fixes
Although your tiny footprint reduces heat loss by area, you’ll still leak BTUs fast unless you upgrade insulation and kill thermal bridges.
Start by verifying R-values against your climate zone per IRC/IECC; aim for R-21+ walls, R-30–38 floors, R-38–49 roofs. Dense-pack cellulose or mineral wool in cavities, then add continuous exterior insulation (1–2 inches polyiso or EPS) to break studs-to-sheathing bridges.
Prioritize the roof: install vent baffles where required, then rigid above-sheathing foam to create a thermal break.
For walls, use a smart vapor retarder (Class II/III) interior side to control diffusion while permitting seasonal drying. Isolate steel trailers with high-density foam below the subfloor, wrap rim joists, and thermally break metal fasteners with washers or isolation gaskets.
Validate with blower-door-assisted IR scans.
Draft Sealing for Doors, Windows, and Vents

Two leaks—air and moisture—will undermine even perfect R-values, so you’ll target door, window, and vent interfaces with airtight detailing. Conduct a blower-door or DIY pressure test (box fan + manometer) to map leaks with smoke or IR. Replace worn door sweeps; install adjustable thresholds and continuous compression weatherstripping.
For windows, backer rod plus high-quality sealant at interior trim creates the air barrier; exterior joints get flexible, UV-rated sealant. Verify sash locks pull evenly.
At rough openings, confirm continuous air barrier: tape flanged windows with acrylic tapes, shingle-lapped; avoid canned foam voids by using low-expansion foam, trimmed and taped.
At vents, use gasketed, louvered covers and mastic-sealed ducts. Seal penetrations with fire-rated caulk where required by code. Retest; document ACH reductions.
Skirting and Underbody Protection for Deep Freezes
When temperatures plunge and wind loads spike, you’ll need a skirting system that creates a sealed, insulated crawl cavity and protects plumbing and subfloor assemblies from convective heat loss.
Choose rigid foam (Type II or IX EPS, or polyiso with foil facer) or insulated structural panels rated for ground contact. Seal seams with compatible tape and closed-cell spray foam. Include a pressure-treated bottom plate on frost-stable footings, a gasketed top plate at the trailer flange, and mechanically fasten per manufacturer wind ratings.
Aim for R-10 to R-15 minimum; higher in climate zones 6–8. Add wind baffles at corners to reduce infiltration. Provide a gasketed, insulated access panel.
Maintain a continuous ground vapor barrier (6–10 mil poly) lapped and weighted. Verify clearances for combustion air and code-required vents.
Winterizing Plumbing and Pipe Freeze Prevention
Even as the shell tightens up, your tiny house’s plumbing remains the most vulnerable path for heat loss and freeze damage, so treat it like a critical system.
Audit all supply and drain runs; eliminate exterior wall routing where possible. Insulate PEX and copper with minimum R-3 sleeves; add vapor-tight tape at seams.
Apply electric heat trace (self-regulating, UL-listed) on cold-exposed sections; follow manufacturer spacing and GFCI protection.
Seal penetrations with low-expansion foam; keep pipes inside the conditioned envelope. Add ball valves with drain ports at low points for fast blow-down.
Program thermostats to maintain a setback no lower than 50°F in plumbing chases. Install smart leak sensors and automatic shutoff valves.
Verify trap protection with RV antifreeze in seldom-used fixtures. Label valves for quick isolation.
Water Supply Protection: Tanks, Hoses, and Filters
Protecting pipes inside is only half the job; your water source and delivery hardware face the harshest exposure. Insulate exterior tanks with closed-cell foam, then wrap with UV-stable jacket; aim for R-10+ in zones 5–7.
Add a thermostatically controlled heat pad (UL-listed) and set a low-temp limit at 38–40°F to minimize watt draw. Seal penetrations with foam to block convective loss.
Use potable, heated hoses or standard hoses inside split-loom plus insulation. Eliminate sags; maintain continuous slope to prevent ice dams.
Install freeze-proof spigots with vacuum breakers (UPC/IPC compliant). Place sediment and carbon filters in a heated enclosure, with bypass valves and pressure gauges pre/post to monitor clogging. Drain housings when idle.
For boondocking, keep fill caps gasketed, vents screened, and verify check valves seat fully.
Heating System Optimization and Fuel Management
How do you turn limited BTUs into steady comfort without wasting fuel? Start by auditing your load: calculate design heat loss (UAΔT) and size output to 80–100% of peak.
Tune setpoints: day 66–68°F, sleep 60–62°F, with 0.5–1°F deadband to prevent short cycling. Program schedules; avoid deep setbacks in subfreezing snaps.
Service equipment. For propane/diesel: clean burners, verify draft, check CO levels, and leak-test fittings with soapy water.
Replace filters, vacuum intakes, and clear flues. For solid fuel: dry wood (<20% MC), inspect gaskets, sweep flue, and use a magnetic thermometer to keep stack temps ideal.
Manage fuel. Weigh or meter usage, set reorder thresholds (e.g., propane at 30%).
Insulate lines, protect regulators from freeze-off, and keep spare nozzles, wicks, and gaskets.
Moisture Control and Condensation Prevention
While tiny envelopes amplify every pint of water you generate, you can keep interior RH in the 35–50% band by balancing sources, airtightness, and controlled exhaust.
Quantify loads: cooking (~1–3 pints/day), showering (~1–2), breathing (~1/pair), plants and drying clothes add more.
Reduce at source: use lids, cold‑start showers, squeegee stalls, vent clothes dryers outdoors, and store firewood outside.
Seal bulk-water paths: flash windows properly, maintain door sweeps, insulate plumbing to avoid cold spots.
Eliminate thermal bridges with continuous insulation; target ≥R-10 subfloor, ≥R-15 walls, ≥R-30 roof.
Install smart hygrometers at high‑risk corners to catch dew‑point approaches.
Dehumidify efficiently: ENERGY STAR desiccant or compressor units sized to 20–30 pints/day.
Manage interior temp to keep surface temperatures above dew point.
Ventilation Strategies for Healthy Indoor Air
Because a tight tiny house traps pollutants and moisture quickly, you need deliberate, balanced ventilation that exchanges stale air without wasting heat.
Install a small HRV or ERV sized to roughly 0.3–0.5 ACH; confirm cfm via Manual D or manufacturer tables. Duct stale-air pickups from bath and cooking zones; supply to living/sleeping zones. Seal all ducts, mastic > UL-181, and insulate runs in cold cavities.
Target source control first: continuous low-speed + boost. Use ASHRAE 62.2 as a baseline; set continuous 20–40 cfm, boost 80–100 cfm for showers/cooking.
Add dedicated range hood vented outdoors; avoid recirculating filters.
Verify balance within ±10% using a flow hood or manometer. Install MERV 8–13 filtration on supply.
Maintain: clean cores/filters quarterly, test defrost, and confirm condensate drainage.
Electrical Load Planning and Power Backup
Even in a small footprint, you must size and stage electrical loads so winter heating, ventilation, and critical appliances run without nuisance trips or deep battery cycles.
Begin with a load inventory: nameplate watts, startup surge, and duty cycle. Prioritize life-safety and freeze-protection circuits. Calculate branch and feeder ampacity using 125% for continuous loads (NEC), and select breakers accordingly.
Separate heat loads from receptacle/general lighting; dedicate circuits to high-draw devices. Use GFCI/AFCI where required and guarantee proper wire gauge for voltage drop under low temps.
Plan load shedding: smart relays or manual transfer to shed nonessential loads when heat calls. Specify an automatic transfer switch for utility-to-backup changeover. Protect electronics with a line-interactive UPS sized for blower motors and controls.
Label panels, document loads, and test under peak winter scenarios.
Solar, Battery, and Generator Cold-Weather Care
Although winter sun is scarce and temperatures sink, you can keep a tiny-house power system reliable by treating each component to cold-specific care: derate PV output for low irradiance and higher module voltage (check Voc vs. inverter/charger max at STC and -10 to -20°C), maintain clean, snow-free modules at the proper tilt, and route wiring with UV/ice-rated jackets.
Use MPPT controllers with cold-Voc headroom and module-level rapid-shutdown where code requires.
For batteries, enable low-temp charge limits: LiFePO4 needs charging inhibited below 0°C or a heated enclosure; lead-acid accepts charge but prefers reduced rates.
Calibrate BMS temperature sensors and log SOC via shunt.
For generators, run winter-blend fuel, spec 0W-30/5W-30 oil, test cold starts, float-charge starters, and stage exhaust clear of snow.
Routine Maintenance and Weatherproofing Checks

When the forecast turns icy, formalize a maintenance cadence that verifies your envelope and systems hold spec under load. Log weekly checks: door and window gasket compression, latch strike alignment, and sash locks.
Recaulk exterior seams, penetrations, and trim with low-temp elastomeric sealant; inspect flashing and drip edges for capillary gaps. Test vapor barrier continuity at outlets and fixture boxes; re-seat gaskets. Verify roof fastener torque and clear snow guards.
Inspect skirting for airflow control and rodent exclusion; maintain venting as per code. Probe insulation voids with an IR camera; backfill with foam where delta-T exposes bridging.
Pressure-test plumbing heat tape and insulation wraps; confirm GFCI function. Clean HRV/ERV cores and filters; balance airflow. Measure infiltration with a DIY blower-door baseline; chase leaks with smoke.
Emergency Kits and Cold-Weather Readiness Plan
Before temperatures plunge, assemble a fail-safe kit and a cold-weather action plan that you can execute in minutes.
Stage gear in a single, grab-ready bin: headlamps + lithium batteries, thermal blankets, wool layers, chemical warmers, N95s, first-aid, multitool, waterproof matches, butane lighter, compact stove, fuel, insulated bottles, high-calorie bars.
Add a heated hose repair kit, pipe wrap, hose Y-valve, spare regulators, and non-toxic RV antifreeze.
Power redundancy: charged power bank, jump-starter, inverter, extension cords, 12V fuses, and a small generator with stabilized fuel.
Heat fallback: catalytic or diesel heater, CO alarm, extra detectors, and fire extinguisher.
Water plan: 5–10 gallons potable, gravity filter, bleach.
Write a 24–72 hour script: roles, contact tree, shutoff locations, thaw protocol, energy budget, check-in times, and go/no-go thresholds.
Conclusion
You’ve hardened your tiny house like a well-tuned system: reduce thermal bridges, seal drafts, skirt the chassis, and winterize plumbing to zero out freeze risk. Protect water lines, size electrical loads, and stage backup power.
Maintain solar, batteries, and generators within spec. Run scheduled inspections, update weatherproofing, and keep an emergency kit ready. Treat each component as a dependency; document configs, set alerts, and test failover. When temperatures drop, your energy budget—and your comfort—won’t crash. Stay optimized, stay warm.


Share: